CheeseMaker testimonials, photos/stories from fellow cheese makers and some recipes.
Read our Workshop Review below.
 Hi Steve,
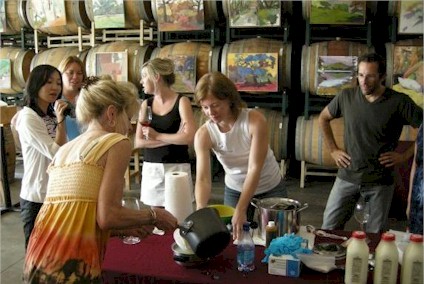
Just got back in town after Easter break- thanks soooo much for all your help... have found art and passion in cheese, and thanks to you, I have been able to throw myself into serious home cheese-making, and have learned such a lot, very quickly, and all my cheese has been so delicious. Now come the years of slow refinement and mastery...I know I will be making cheese forever!
All the best,
Sacha L. :-)
Davis, California
Hi Steve,
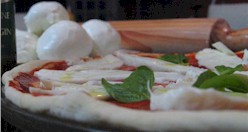
I've done it already, i had my curds fermented for 5 hours more to have that nice white glossy cheese although i need more practice on hand cutting of mozzarella during Hot Bath. Attached are pictures of my third batch. I took pictures of my uncooked Margherita Pizza while heating my oven, Im really happy for this one. Regards. Thanks a lot Steve.
Nilo R.
Steve;
Here are some pictures of my cheesemaking journey. I attended one of your classes in the spring and then was fortunate enough to find a local source of goat's milk, so I've been experimenting madly ever since. Hope you will offer an advanced cheesemaking class I could attend sometime! I've mastered the camembert and feta, my mozzarella is a rocky experience and I've not tried any hard cheeses yet.
Thanks so much for opening up a whole new world to me! Indeed, life is too short to eat bad cheese.
Karen K.
Goshen, Indiana
 Dear Steve,
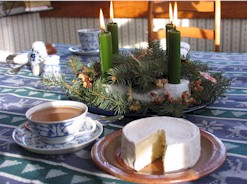
Happy New Year from a happy camembert maker. We had the cheese for breakfast. It was super delicious. Thanks for all your hints and help.
Yours,
Ted B.
Ely, IA
Dear Steve,
Thank you for the updates!
My wife and I are experienced home-brewers (beer and wine (and yogurt and bread)) and have all the beer making and sanitizing routines nailed down well. But, making cheese will be a new experience for us. I haven't had a chance to fully soak up the instructions in your guide, but it seems pretty straight-forward. And the pictures ... are worth a thousand words, as they say.
Will let you know if we have any questions.
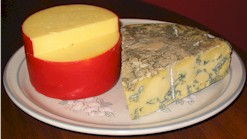
Here's a photo Stacey took last Sunday before we sat down to enjoy our first homemade cheese. And, it was so good! This weekend we plan to make our first Stilton.
Best regards,
Mike F.
Fairfax, California
Steve,
Thanks for helping us make our wedding memorable. With your help, we made over 170 bottles of wine and 25 Camembert cheeses. You would not believe how many people complimented us on the fantastic taste of the wine and cheese. Making the Camembert cheese was so easy I couldn't believe it. It turned out creamy and delicious. If anyone likes Camembert or Brie cheese they have to try making it themselves. I would recommend making a batch to anyone.
Sincerely,
Derek & Niki F.
Glendale, Wisconsin
 Steve:
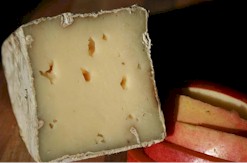
This cheese is insane good. Made a year ago and cellared. It's a Swiss style that really took a long time to come into it's prime but is incredible now. Does not taste like a Swiss...you'd guess it was some weird small batch French style aged in a cave.
Britt A. Bunyard
Publisher & Editor in Chief, Fungi Magazine
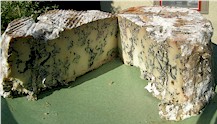 Steve,
Thanks for taking the time to talk with me yesterday. It was nice to actually talk to a real person about what might be growing in my basement. After I got home from work yesterday I cut open the other block of blue cheese. See the attached file. It's much different than the last. It has less of the orange/red mold and is much more firm. Now I'm beginning to understand the differences that moisture content makes to a cheese.
Thanks again.
Maria M.
Minneapolis, Minnesota
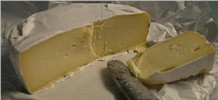 Hi there Steve,
Just could not wait any more !!!!!!!, so "we succumbed to the Camembert". Have just cut and tried the Camemberts, FANTASTIC !!!!! Really great recipe of yours. Even at this 'early stage' the taste and texture is fantastic. Does have the odd bit of Blue hiding there, but it is not noticeable in the taste. We'll leave the others 'till a later date, IF WE CAN, and keep on trying the different ages. Unfortunately I only made 12 Camemberts in my 1st trial but hope to do a much larger batch shortly. Should be about 30 Camemberts. Will keep you posted. Many thanks for ALL your input, best wishes to you and all at home.
Keith & Lynne B.
Christchurch New Zealand
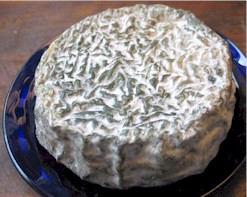 Steve,
I had a mystery cheese that got lost in the back of the "cave" - it actually turned out deliciously - the core is not chalky but creamy. The rind is delicious. Not sure I can duplicate it, but am going to try.Thanks for the extra instructions. BTW, my pyrenees goat tommes have finally turned the toasty caramel color it's supposed to. Exciting. Will be able to taste in a few weeks (raw milk cheese). Sure having fun. You have been a great help.
Best,
Thea
Oregon
Note: By accident Thea made a blue/camembert. Looks very well displayed on a blue plate.
Baked Truffled Brie en Croute
courtesy of
Linda T.
Ontario, Canada
4 ounces cream cheese, room temperature
1/2 teaspoon salt
1 tablespoon truffle oil
1 teaspoon fresh shaved truffles or truffle paste (optional)*
1 sheet frozen puff pastry, thawed
1 small (8-ounce) round (wheel) brie cheese
1 egg, lightly beaten
Baguette, crostini, or crackers
* NOTE: You always want to maximize the truffle flavor, using the least amount of the ingredient as possible. So always slice into paper-thin wedges or strips. Use a truffle shaver (similar to a cheese grater) when shaving truffles.
Butter a baking pan and line with aluminum foil. In a small bowl, combine cream cheese, salt, truffle oil, and shaved truffles; set aside.
On a lightly floured surface, roll out sheet of puff pastry 1/8-inch thick (approximately 15 inches in diameter); using the brie as a guide, cut out one round the size of the brie for the top and cut another round 1-inch larger. Using a small cutter (any shape will do), cut out some decorative pieces.
Half brie cheese horizontally; spread the truffle cream cheese evenly over the bottom half of the brie. Place the top half over the truffle cream cheese. On prepared baking pan, center the brie cheese on top of the larger pastry round; wrap pastry up over brie (without stretching). Brush border with some egg and top with remaining smaller pastry round; pressing edges of dough together gently but firmly to seal. Brush top with egg. Arrange decorative pieces over the top of the pastry dough; lightly brush with egg, being careful not to leg egg drip over edges (this would prevent them from rising). With the back of a table knife, gently score side of pastry with vertical marks (being careful not to pierce through dough). Chill brie, uncovered, 30 minutes to set egg wash. Brie may be made to this point one day ahead and kept chilled, covered loosely.
Preheat oven to 425 degrees F.
Bake Truffled Brie in middle of oven 20 minutes or until puffed and golden brown. Remove from oven and let stand in pan on a rack about 20 minutes for a very runny melted cheese or about 40 minutes for thicker cheese. To serve, transfer to serving dish and serve with baguette, crostini, or crackers.
Serves 6 to 8 as an appetizer.
Cheese in Puff Pastry with Fig Sauce
courtesy of Linda T. Ontario, Canada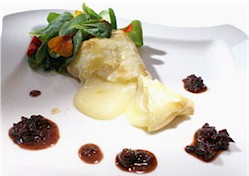 For the Cheese
100 g (3 1/2 oz) puff pastry dough
200 g (7 oz) camembert cheese , cut into 4 wedges or rectangles
1 x egg, separated
Lamb’s lettuce (mâche)
For the Fig Sauce
1 x shallot, finely chopped
1 clove garlic, finely chopped
15 ml (1 tablespoon) butter
4 x Blue Ribbon Orchard Choice-type soft dried figs, finely diced
125 ml (1/2 cup) dry red wine
125 ml (1/2 cup) balsamic vinegar
15 ml (1 tablespoon) sugar
Directions:
For the Cheese Line a baking sheet with parchment paper.
On a floured surface, roll the dough into a 25 x 38-cm (10 x 15-inch) rectangle. Arrange the cheese pieces along the edge of the shorter side. Cut the dough between the pieces, leaving a 1-cm (1/2-inch) border around each. Brush the border with egg white. Cut the remaining dough into 4 squares and use to cover the cheese pieces. Trim any excess dough, leaving a 2-cm (1-inch) edge. Fold 1 cm (1/2 inch) of the edge back toward the cheese. Using the tines of a fork, press the edge around each piece to seal. Make a pea-sized hole in the dough above each piece of cheese. Transfer to the parchment lined baking sheet. Beat the egg yolk with the remaining white and brush the dough with the mixture. Freeze for 20 minutes or refrigerate for 45 minutes.
 Thanks Steve;
I always make ricotta from my whey. I have been making cheese for 2-3 years. Our problem in NZ is we have great milk (and bought cheeses) but only one supplier of cultures etc and it is VERY expensive, so I am hoping your supplies are what we want so that we can make more cheese! I make Wensleydale as my everyday cheese as the grandkids like it, but I also make Stilton, Camambert, feta, cheddar, and occassionally parmesan but it takes so long to mature!
My husband makes cider for us and friends, 200 litres last year. He used to make a prize winning dry red wine. We are going to have a go at Perry, a drink similar to cider made with pears. The Stilton (pictured left) is three months old made with 9 litres of fresh Holstein milk in a 22cm by 10cm mold. I find this size works well for maturing and cutting for our family. The cheddar is made from 8 litres of the same milk, five months old with no colour added and waxed to keep the cultures from other cheeses away!
Linda
New Zealand
Steve,
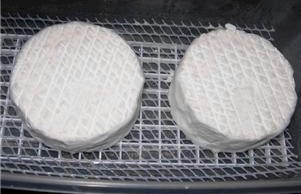 here's some pics of my first Camembert cheese, just before wrapping, and 6 weeks later.
I followed your directions using skim milk and heavy cream. Creamy and very tasty! I am well pleased with my first effort.
As I hone my cheesemaking skills, and have now found a source for fresh raw milk, I can just guess how much better future cheeses will be.
They bread is home made using the whey instead of milk or water. If you want the simple recipe, let me know. I can hardly wait to taste my first blue cheeses!
Regards,
Paul C.
Lincoln, Illinois
Steve;
Well, I finally baked my little wheel of cheese wrapped in phyllo. I cut it in half to make two layers (like a cake) and drizzled honey and pecans in the middle before wrapping it. 350 for 15 minutes and it was oohey gooey goodness. The worst part was realizing that was the last of my cheese and I have to hope my jersey freshens this spring before I can make more. (call me a snob, but I cant stomach store bought milk after having Tinkerbelle's....) The honey made the cheese turn even more yellow, but it tasted great.Thought you might like a photo.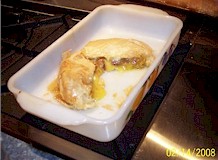 Diana's recipe:
For my size wheel I used about 8 sheets of phyllo dough. I took my wheel and cut it through the middle to make two thin layers (like making a two layered cake). Then I spread a nice coating of honey on the cut sides of the cheese. I sprinkle a layer of crushed pecans on the honey and sandwiched the halves back together so it looked like it id before it was cut, now it just has a inner layer of honey and nuts. You could probably use whatever type of crushed nut you prefer. You could even get fancier and add some chopped dates/ figs/ or even dried sweetened cranberries!!!.. Then I brushed about 8 sheets of phyllo dough with melted butter and set the wheel in the center of all eight sheets and folded the phylo over so it was all wrapped like a little present. I put it on a greased baking sheet with the phyllo wrapping ends on the bottom- so it doesn't unfold while baking, and put it in a preheated oven at 350 for about 15 minutes, until the phyllo was brown and toasty. I let it rest for at least 5 minutes before cutting. Now if your wheel is bigger you may have to let it go longer or use more phyllo. I don't think you can really mess it up, however it comes out I am sure it will be good.
Mike & Diana Austin
Misty Mountain Farm
Grantsville, WV
 Hi Steve,
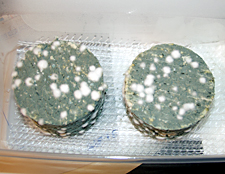
I just wanted to take a moment and thank you for answering all my rookie questions and helping me make my first batch of blue cheese. I'm glad to learn my cheese looks normal - it sure is blue-green - so I guess I did it right!
I couldn't have done it without your excellent book. The step-by-step instructions with photos are invaluable - and your personal hand-holding - well, what can I say?
You're the BEST!
What a fun hobby too! Who knew making artisan-quality cheese was so easy? Well, I guess you did. Thanks for sharing your knowledge and passion with the rest of us and especially for all your personal help and attention!
Most sincerely,
Tom B.
Mequon, Wisconsin
Hi Steve,
I made the camembert/brie cheese from the kit and ebook I bought from you back in July. We tasted it this morning. It is fabulous!! Next, I'm making the blue cheese. Thanks for the great kit for trying this and the really great instructions.
Karen Z.
Jefferson, Maine
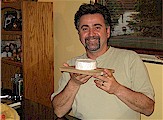 Hi Steve,
Just wanted to tell you I made 8 Camemberts for Christmas and they came out great!!
My family loved them.
Thanks for all your help. Attached is a picture of me and my creation.
Sincerely,
Corry De R.
Santa Clarita, California
 Hello Steve
My mother Isa has used cheese making products from Steve.
I would like to take this opportunity to tell anyone thinking of trying to make these cheeses that Steve's website is the place to give it a go.
Not only are the instructions clear and easy to follow, the end results are really worth eating.
We have now made a number of cheeses from Steve and have every confidence in endorsing his products and methods.
Jim M.
Scotland, UK
 Steve,
Here is a picture of my first batch of Camembert, molds filled and 24 hours after starting it. I would highly recommend your instructions and kit for a first time cheese maker. Nowhere else have I been able to find the step by step instructions.
Thanks again,
Charles B.
Wisconsin
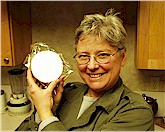
Hi Steve -
Thought to write you a testimonial:
My cheese making class with Steve Shapson was thorough and delightful.
I came away with explicit directions for making two different cheeses and great sources for any supplies I might need.
He was available to answer any questions that came up as I got started.
It was easy.
Betsy T.
Madison, Wisconsin
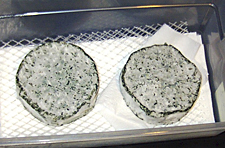 Hi Steve,
Thank you for your recent update on making blue cheese. Your recipes are great, easy to follow, and produce excellent results, even for a novice (like me!!).
Thanks,
Carl K.
Massachusetts
 Hi Steve:
Your Stilton Blue Cheese recipe worked great for me the first time.
I had 2 failed attempts from someone else's recipe before I tried yours.
My friends love it. They say it's the best blue cheese they've ever tasted.
I'll be making lots of it now because it's a great hobby for me and my friends all want more of it. I'm going to make your Camembert/Brie soon.
Thanks for all of your advice, Steve.......
Les K.
Oregon
Hi Steve: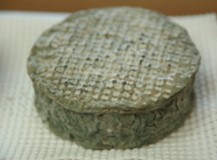 The Cams were the first cheeses I tried, and they are beautiful. I simply followed your instructions as best as I can, and things came out great! Since there is nothing but store milk out here, I am pleased with the results. They are about a month and a half old right now, so we are going to try one soon. I'm surprised that the white mold is still as active as it is. The cheeses still feel furry to the touch.
I can see that they are settling down now though, so I think in a week or two we will try one. The Stilton were inspired by a recent trip to London, where we had the privilege of stopping by Neal's Yard and really spent some quality time with the people there. My next project will be made with (hopefully) raw mild, or only pasteurized milk. I've included some photos of a trick I figured out, due largely to going out of town for a week, and my Stilton still moisturizing the lid of its container. I had to mop water beads off the lid of its aging box, and I didn’t want to leave the lid partially open for a week, because I didn’t want the beautiful blue molds to dry out. So my solution was to 'suspend' a paper towel across the opening, and then snap the lid in place. It works wonderfully! All I needed to do was put two layers of towel over the open top of the container, snap the lid in place, and enjoy the Oregon coast for the Christmas Holidays. When we returned, the towel had absorbed quite a bit of moisture, but NONE of it had dropped onto the top of my cheese! I'm sure plenty of people have already figured this out, but it might be a worthy addition to your cheese making instructions, in case people start a cheese and need to leave town. This is a simple solution to help cheese heads sleep better at night. I still have a piece of towel in there, so I don’t have to baby-sit quite as much. OK, that's it for now, I'll keep you posted on the next cheese we do!
Dave C.
Wildomar, California
 Hey, Steve!
I've downloaded my eBook, and absolutely love it!
I like that it has simple to read and follow instructions, and I love how you make use of common household items!
And your love of the craft really shows through, and gets the reader psyched up-at least that's what it did for me, LOL!
I really think you are on to something, and can't wait to get my kit!
Thanks again!
Vanessa U.
Canada
 Steve's kit is great.
The instructions are clear and easy to follow.
The recipe itself is very forgiving and the results are delightful.
Steve answered all of my questions and offered encouragement.
I had a lot of fun with this and am looking forward making camembert on a regular basis.
Take care.
Michele
Seattle,Washington
I just wanted to thank you for all your cheesemaking help and support. Your book is a tremendous hands-on resource, and along with your supplies and cultures, had me producing great camembert from the very first batch. I have been producing batches of 8 almost monthly for a year now with consistent success.
Best regards,
Brian B.
New York, New York
Steve, I made the two camembert cheeses yesterday and I'm very happy with how they look this morning. The book you wrote has very clear with explicit instructions so I was successful on the first try. the steps were easy to follow and my resulting product looked just like the pictures in your book.
My refrigerator won't go any higher than 38 degrees so I'm using my garage for the 42-48 degree ripening process. That works fine in Colorado in the winter. I will have to get a cheese ripening refrigerator for the garage for the summer. I have been a cheese lover for many years. My first trip to France taught me what cheeses can really be like and how wonderful and different they can be from most American made cheeses. I have long wanted to make my own cheese and you have opened up a whole new world for me. I can't thank you enough.
I have ordered more cultures so I can keep a good supply of cheese rotating. I'm sure I will be a customer for a long time.
Many thanks,
Fred B.
Montrose, Colorado
 Suhaizee and his family.
They live in Malaysia.
They just started making gourmet cheese.
His family is eagerly awaiting his success.
This cheese was really easy to make and aged well in my refrigerator. I have never had one of these not turn out just like Steve said it would. I had been put off trying to make Camembert/Brie in the past because I was always told it was very temperamental to make, but I have found with Steve's directions and supplies it really couldn't be simpler. If you have spare fridge space, you can make this!
Mike and Diana Austin
Misty Mountain Farm
Grantsville, WI
Dear Steve, I wanted to say how happy I am with the cheesemaking kit I ordered from you, and also with the continued informational emails! I received my kit on Thursday and made my first camemberts yesterday. The process happened exactly how you described in the book, and the cheeses look great so far! Also, thank you so much for substituting vegetable rennet for me. It gives me so much peace of mind to know that I can now make sure that the cheese I use is vegetarian, and made from the milk of local cows that are grass-fed, raised organically, and treated very well. I can't wait to continue learning new cheeses! Thanks so much for everything!... Kind regards, Erynn Traverse City,Michigan
Steve, It is rare these days to see customer service done right. You have that my friend I am very impressed with your followthrough and the fact you stay in contact with your customers... Scott H. Ontario, California
Hi Steve, My son and I are having a blast together, making cheese with the tools, cultures and information you have provided. Many, many thanks! I'll be recommending thecheesemaker.com to all the people who are interested in making cheese - and I find that a lot ARE when I tell them I'm learning.... Thanks again, Matthew Columbus, Ohio
Steve, I'm writing to thank you for the great quality cheese bags! I am using them (almost daily) making raw tofu (sacrilegious to admit to the master cheesemaker.) They are sturdy, wash easily, work perfectly, are the critical factor making this a simple process. My cheese cloth days are over. I'm grateful for your website, speedy delivery and great customer service. Wishing you continued success. Joanne W. Ellensburg, Washington
Hi Steve I am happy to tell you I have finally made an awesome Camembert cheese after many attempts. If you would like I could send you a sample... You have been of great help to me and I am very thankful for all your feed back and additional information. I am going to attempt again after the holidays. We a very busy with all the Holiday orders we are receiving. Tony Kutter Kutter Cheese Factor
Hi Steve, In case I forget to tell you later, I think that you are awesome! I just got my shipment today - so fast, so reliable, thank you. I do a fair (okay, maybe more than a fair, but don't tell my husband) amount of internet buying, and you are far and away above all the others. And thanks for the brush - it will come in very handy for my new purplish wax. This Sunday is "goat cheese" day - which is the real reason I signed up for Sacha's class. (Course, I had no idea that I would be hooked on cheesemaking, from day 1) Thanks again, till next time Leslie T. Davis, California
Thanks Steve! Our Camembert turned out amazingly well. And we found a source for raw milk right in our neighborhood. Maybe we will try this recipe next. Thanks for all the info. Roy K. Chicago, Illinois
... The feta recipe you posted is excellent. I have made three batches already and all gets eaten before it even gets properly matured! Right now I have my first gouda in the press. Soon I will be needing more cultures, but at the moment everything rolls well. Also, I commend your customer service. I just had some bad experiences with online orders and customer service (extra cost, parts of shipments missing) and I just wanted to tell that you're doing good work. Keep it up :) -Jari H. Helsinki, Finland
Hi Steve, I have to tell you that I LOVE your cheese press. My mom bought a second cheese press for me as a gift from ebay, but I don't use it because it is so poorly made, in comparison to yours. Right now I'm doing some farmhouse cheddars (the first batch should be ready to eat next week!). I really appreciate the additonal info you've sent. Thanks! Lori G Cook, Minnesota
Steve, I have just tried my first Brie and was amazed. One that it was so easy to make and two that it tasted amazing. I now have two blue cheese working as well as two more Brie. I have been using the raw milk straight from the Dairy. I told all of my friends about it, now they are wanting to learn as well. Do you know how to make St. Andre How do you make a tripple cream cheese? Thank you, Best, Josh S Washington, DC
Steve- My wife and I have just started our batch of blue and have been aging our Camembert for a few days now. what do you recomend for chevre, gouda, havarti ??? We love the kit and have a new hobby thanks to you! Joel & Angie E. Lakewood, Ohio
Hi Steve My last batches of cheese have been far and away the best ever...for two reasons, that I can see; a) using that fresh whole milk b) very diligent to squeeze out as much water as possible The brie cheeses are just now becoming ripe and are superior...just need to get a little stronger. But, we're extremely pleased with the texture. The twin blues are ripening nicely too and are nice and firm. Each must be about 4-5 lbs I would guess. Anyway, they'll be very tasty and photogenic for Thanksgiving! Best wishes, Britt Germantown, Wisconsin
Hi Steve You have a nice site - very helpful. So far I've only made mozzarella and ricotta and I've done that for years, growing up on a small farm and being Italian that's how you make lasagna, manicotti or any of the cheesy meals and deserts I grew up with. It was like making the sauce, never thought much about it; it's all a part of the process of home cooked meals. Now I want to try making cheese - real cheese, parmesan, Romano, provolone, cheddar. Thanks! Debi Norwich, Connecticut
My Dear Steve, This is a note to tell you how much I enjoyed your Camembert Cheese Making Workshop at Cardinal Stritch University. I am a true Wisconsinite from way back and I love cheese. Camembert is one of my favorites. My daughters serve it warm at parties with various toppings. I didn't know it was so simple to make and you don't need a lot of equipment. And you can use milk you buy at the grocery store. I would recommend your cheese making course to anyone who likes to play around and learn about food. Sincerely, George Restaurateur Wisconsin P.S. I forgot to mention the cost wise savings to make your own Brie. They are amazing. And you get to do some bragging. Dear Steve,
We got the press today. Amazingly fast! As I anticipated from your email, it is superb. My wife is reading the instructions as I send this. I really appreciate your help and professionalism. I will make sure she goes to your website and I am sure you will have a satisfied customer for life. I left positive feedback on EBay. Don
Hello Steve, Thank you for your attentive support. We are almost done with our remodel, have installed an under counter refrigerator as the dedicated "cheese cave", and are about to embark on our first cheese batches! The e-book is very informative and I am so appreciative that you included the information I need to make me a success. I have tried cheese before, but only using rennet, you can guess, it was unsuccessful. I will be in touch with you as soon as we make the first batch. As a side note, I am also a wine maker. Actually won a bronze at the state fair in CA. Having just moved to OR, I know that I will have less wine making, but I can start on a new adventure. Thanks for offering such a nice site with everything I could possibly need!! All the best - Pam
Steve I am having a ball. Here is my website. I will have some media coverage coming out in December and will share that. Enjoyed your recipes. Keep up the good work! Haute Goat Creamery. Thanks Nancy Lubbock, Texas
Steve I purchased your products for my son in law for Christmas last year. He has enjoyed them so much and we have enjoyed what he makes for all of us. So far as I have been told all has gone well other than the mess he can make doing it but aren't all of us wife's particular about what goes on in our kitchens. Thanks for all the info and products. Have great holidays. Maggie Leawood, Kansas
Hi Steve, Yes, I am having success! We ate our first camembert on Thanksgiving and the blues should be ready for Christmas. They turned out amazingly. I will send you pictures, etc. once the blues are done. . I am making another batch of camembert as I write this! Thanks for your help and I'll keep you posted.. Amanda Buffalo, New York .
Steve- My wife and I have just started our batch of blue and have been aging our Camembert for a few days now. what do you recomend for chevre, gouda, havarti ??? We love the kit and have a new hobby thanks to you! Joel & Angie
Steve, Thank you very much for the updates. The ripening-time info is very timely. I have spent the past couple evenings reading everything I can find regarding making Camembert. I seem to be having success. Just this evening, we ran into a friend that I gave a cam to a few weeks back. He said that he and his family loved it. Everything from warming the milk to removing the moulds and salting the cheeses seems very straight forward. It is the affinage process that keeps me guessing! The full white bloom comes on nicely. It is the slight moisture that beads inside the wraps and the very firm texture at four weeks age that has me a bit worried about my current batch. (Next batch I will ripen less and add the rennet sooner.) Again, thanks for all your input. (I am hooked!) Bret
Hi Steve, just wanted to let you know that my first camenbert and blue cheeses came out great. I abused the curds when making camembert, cause I thought I was making blue, but it turned out good anyway. I couldn't wait longer than 30 days to taste the blue. It is very mild and wonderfully creamy. I shared the blue and it was declared addictive! Not bad for the first time. Thanks!! Martina F. Bakersfield, Ca
Steve, I just wanted to reply and say thank you. My two first Camembert are almost covered in a beautiful white mold; so far my experience has been positively inspiring. Best regards, Dawn S. Duluth, Georgia
Dear Steve, Curtis just got his cheese making kit and is ecstatic! Thank you so much for being so prompt with your shipping and so generous with all the extra advice/tips and follow-up. We will let you know how our cheese-making weekend goes. Warmest regards, Anca I Portland, Oregon
Steve, You have absolutely the best customer service and follow-up that I have EVER seen - We have a small business and I would love to have the same level of customer service. Please tell me - what books have you read, classes you took, anything else? It's superb (even answering calls on Sunday). Thanks. Patti Warnke (John) St. Johns, Michigan www.ourfarmanddairy.com
Workshop Reviews
February 27, 2016 Custom Workshop 
-
Posted by Laurie L., Louisville, KY on 7th March 2016
Hi Steve,
Wow what an awesome experience!! Steve was informative, entertaining and a joy to spend time with. We could tell immediately there was passion and great care taken. He designed a custom cheese making workshop for our small group of 9. It included a tour of his beehives as well as educational films, 1x1 cheese making with a custom wine and cheese tasting. Steve and his wife were great hosts and I plan to return again with family! Thank you for an awesome experience.
August 22-23, 2015 Weekend Workshop 
-
Posted by Bobbie G., Bemidji, MN on 27th Aug 2015
Hi Steve,
First of all I want to tell you that I am so very happy to have met you and to have attended your workshop!!! You answered a lot of my questions and it was quite an education to see how you managed all the different cheeses--actually, it was an amazing feat. Thank you, thank you for sharing so much of yourself with us!!
Thank you again for everything!
Bobbie
August 17-18, 2013 Weekend Workshop 
-
Posted by Joanne S., Crete, Ill on 27th Aug 2013
Hi Steve,
I have all positive feedback about the workshop. It was so enjoyable. Your enthusiasm about cheese making and teaching others really came through. I felt that the layout was efficient and good hygiene was practised. Your gardens were a lovely place for a change of scenery and lunch. And, of course, the heavily laden dining room table filled with cheeses, fruit, etc. and wine was a lovely way to cap it off. It also showed me how to present cheeses beautifully. I'm telling anyone who will listen about a neat thing to learn in Wisconsin. I also found some of the cheese you served at Pastoral. Now I want to make some fig jam. The cheeses I brought home went to good use...
Thanks again for a wonderful class!
Joanne
August 17-18, 2013 Weekend Workshop 
-
Posted by Audrey M., Michigan on 26th Aug 2013
Hi Steve,I just wanted to thank you for a wonderful workshop.... I had a very nice time and learned more than I even thought possible. I have a lot of ideas for cheese-making, and I'll keep you posted on how I'm doing with them (especially the crazier ones). You are a very gifted instructor.... and that comes from a college professor!
Thanks again,Audrey
June 29-30. 2013 Weekend Workshop 
-
Posted by Audrey O., Cedar Rapids, IA on 26th Aug 2013
I just wanted to send a quick thank you note to tell you how much I enjoyed taking your class last weekend. You Rock! I will be up for doing another one if it is offered with different kinds of cheeses. If you are ever in Cedar rapids or passing through stop and we will open some great wine and you can taste my cheese. Thanks again, over the top awesome!
October 19-20, 2013 Weekend Workshop 
-
Posted by Beth Harman, New Virginia, Iowa on 22nd Oct 2013
Steve,
Thanks for the most fantastic weekend of learning the art and science of cheese making. This is the second time I've attended your workshops and I didn't think it was possible to outdo the first one but you sure did. I can't believe we actually learned and made Camembert, Blues, Gouda, Cheddar, curds, mozzarella, Ricotta, Mascarpone, Butter, Chevre, buttermilk and yogurt. Unbelievable! Then to have the added benefit of bringing all our cheeses home to enjoy and age, what a bonus. I am grateful for the time and effort you, MJ & Michelle put into organizing all our workshop materials, kits and supplies to take home by car or plane. Your energy and contagious enthusiasm for the art of cheesemaking is what made me return for more. Keep it up and I'm sure we'll be back up to see you again on another cheese adventure. At the very least we'll come back for that fabulous cheese and wine spread you put on.
October 19-20 2013 
-
Posted by Kelly (Clearwater, FL) on 25th Oct 2013
Steve,
What an incredibly fun and informative weekend. Having no experience with cheese making I walked away with a wealth of useable knowledge. Although my learning curve was vertical your presentation of the information was at a level I could comprehend, yet there were experienced cheese makers in the class and I know they also learned new techniques and approaches. A real comment on your role as an instructor to be able to teach to such a wide range of people. Thank you for sparking my passion for cheese making. I highly recommend your weekend class!
July 13-14 2013 
-
Posted by Tom D. (Butler, WI) on 24th July 2013
Steve,
I have taken 2 cheese making classes with Steve and have been thoroughly impressed with his knowledge. Both classes were hands-on and loads of fun. Some of the classes include a cheese and wine tasting. The classes included seven different cheeses plus butter and several other products. So far I have made fantastic Camembert mozzarella and ricotta at home. I've also made the best tasting butter. Thecheesemaker.com also offers a wide range of hard-to-find cheese making products.
October 19-20 2013 
-
Posted by Ellen (Salem, MO) on 11th April 2015
Hi Steve,
I truly enjoyed the workshop last weekend. You did a fantastic job with everything, from planning to teaching to follow up, to the products you gave us and all the wonderful documents! I tend to be a bit on the critical side at things like this, but I thought everything was great!! I can't wait to see how the camembert and blue turns out. We already shared the cheddar curds, buttermilk and mozzarella with our cousins. Thank you for a wonderful hands on experience!
